.JPG)
Here I am again, dreaming of strawberries. I always start adding berries and fruit to my designs when spring comes around. Perhaps it’s because the splash of colors is always a delight.
This strawberry bag for your doll is a quick project to make and is a cute way to accessorize in spring or summer. Learn to crochet a super sweet strawberry purse with this easy-to-follow free pattern! It will surely steal hearts! Perfect for carrying doll´s essentials in style. These doll´s accessories are the perfect companion for every child, whether it is to play or travel with. It is also a lovely gift for any dolls fan! The pattern is very detailed. It comes with easy-to-follow written instructions and a photo tutorial. So, grab your hook, heat up a cup of hot cocoa or coffee and let’s make these little buddies together. If you’re looking to practice crocheting in the round this is the perfect coaster pattern to practice with! Let´s strat crafting!
SUPPLIES YOU NEED
cotton yarn (e.g. Schachenmayr Catania 125m/50g) in the following colors: red, green and white or any color you choose, crochet hook 3 mm, beads, scissors, tapestry needle, Fiberfil stuffing, satin ribbon.
SKILL LEVEL
I would classify this free duck crochet pattern as an advanced beginner. It is necessary to have some experience with amigurumi before creating this project.
SIZE
The ready purse is approx. 10 cm high, from bottom to top, can be made bigger or smaller depending on the yarn and hook you use.
SKILLS YOU NEED
chain, single crochet, double crochet, half double crochet, slip stitch, increase, decrease
ABBREVIATIONS
Ch =chain
St = stitch
Sc = single crochet
Sl st = slip stitch
dec = decrease stitch (two single crochets together)
inc = increase stitch (two single crochets in the one stitch)
Dc = double crochet
Hdc = half double crochet
Tc = triple crochet
Rnd = Round
* = repeat the instructions for the times indicated
(...) = total amount of stitches
TIPS
- Do not join rounds, work in a continuous spiral.
- Use a stitch marker or piece of yarn to keep track of the last stitch in each round
- All stitches are worked into both loops, unless stated otherwise in the pattern.
- When filling with polyester stuffing, pull apart each large chunk into many smaller chunks. This ensures an even distribution of firmness within the amigurumi
- Purse can be made in any desired colors.
Seamless way of changing color when working in the round
Pick up the new color at the end of the round: inset your hook into the stitch, yarn over the new color and pull through the stitch and the loop on your hook to complete the stitch.
To make a magic ring
- Loop the thread twice around your middle finger
- Put the hook under both loops, pull the yarn under the loops and hook the thread again
- Pull the thread through the new loop. The first crochet stitch is ready!
- Repeat the number of times needed.
- Pull the inner threads to tighten the ring.
INSTRUCTIONS
The bag is worked from the bottom up in simple crochet increases.
BOTTOM
Crochet with the color yarn you wish and begin with a magic ring.
.JPG)
Round 1: 6 single crochets into Magic Ring
Round 2: increase 6 times (12 stitches)
Round 3: *single crochet in next stitch, increase*, repeat from* to* 6 times (18 stitches)
Round 4: *single crochet in each of next 2 stitches, increase*, repeat from* to* 6 times (24 stitches)
Round 5: *single crochet in each of next 3 stitches, increase*, repeat from* to* 6 times (30 stitches)
Round 6: *single crochet in each of next 4 stitches, increase*, repeat from* to* 6 times (36 stitches)
Round 7: *single crochet in each of next 5 stitches, increase*, repeat from* to* 6 times (42 stitches)
Round 8: *single crochet in each of next 6 stitches, increase*, repeat from* to* 6 times (48 stitches)
Round 9: single crochet in each of next 48 stitches
Round 10: *single crochet in each of next 7 stitches, increase*, repeat from* to* 6 times (54 stitches)
BEUTEL
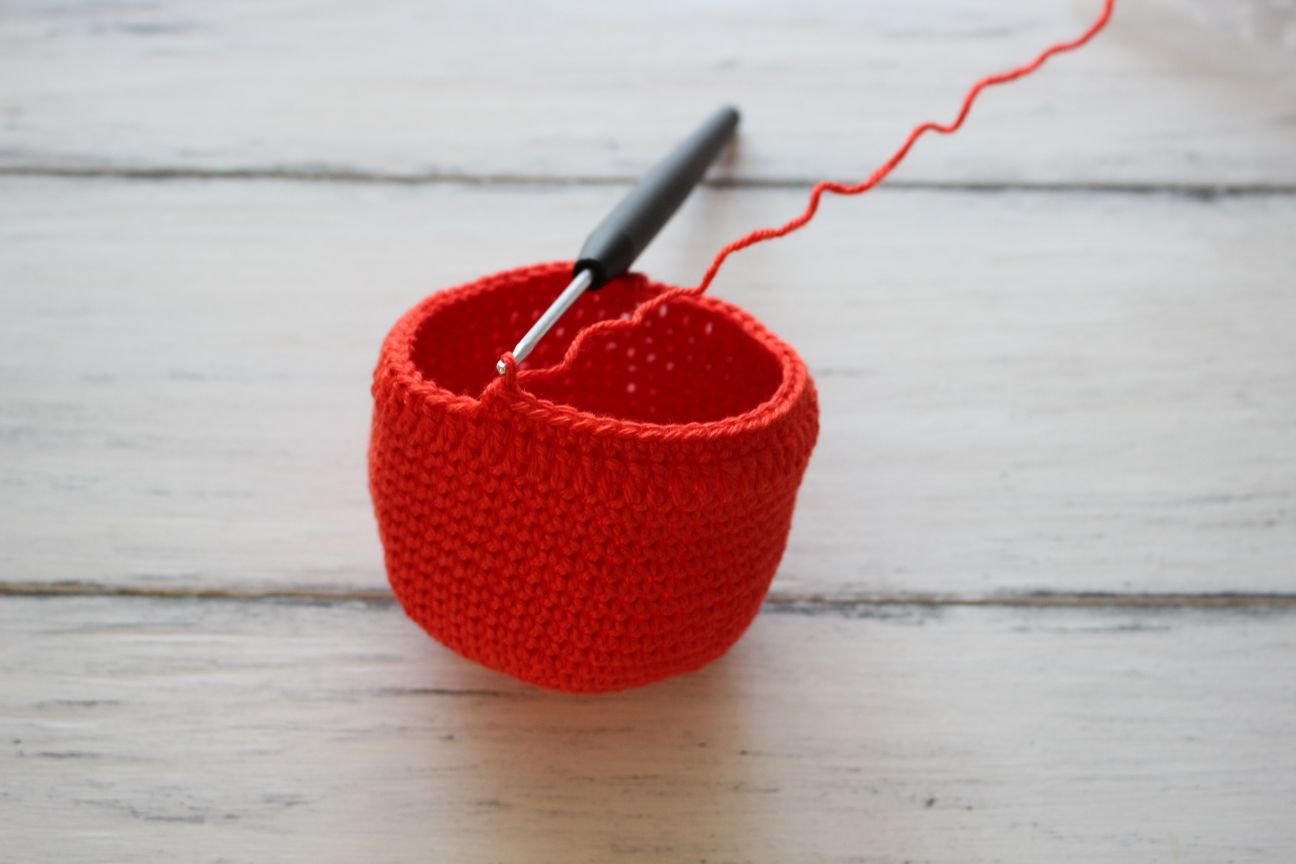
Rounds 11-20: single crochet in each of next 54 stitches
Round 21: chain 2 stitches, double crochet in each of next stitch till the end of round
Round 22: work one round in single crochet´s. Fasten off.
BORDER
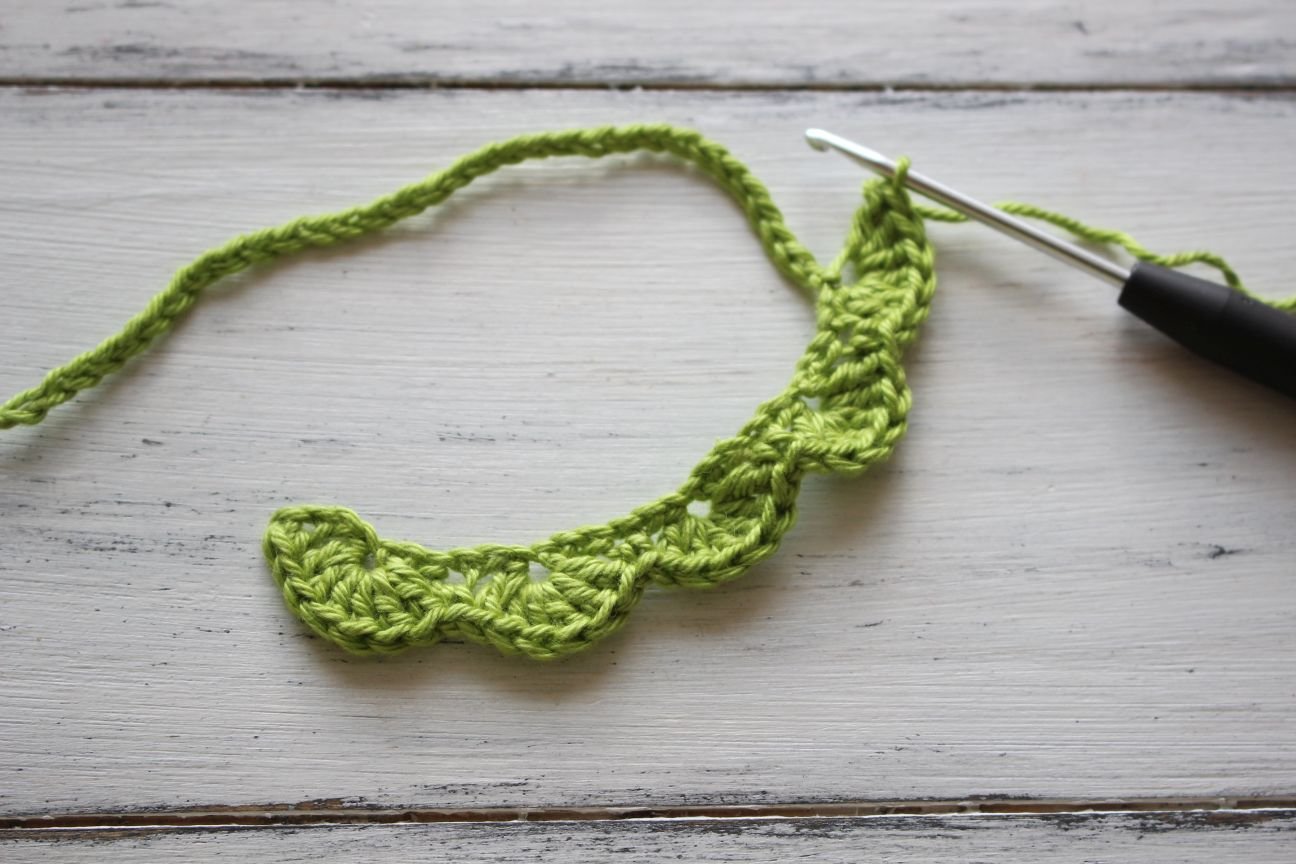
chain 62 stitches, sc into the second chain from the hook, *skip next 2 stitches, 6 double crochets in the next stitch, skip next 2 stitches, single crochet in the next stitch*, repeat from* till the end of the row;
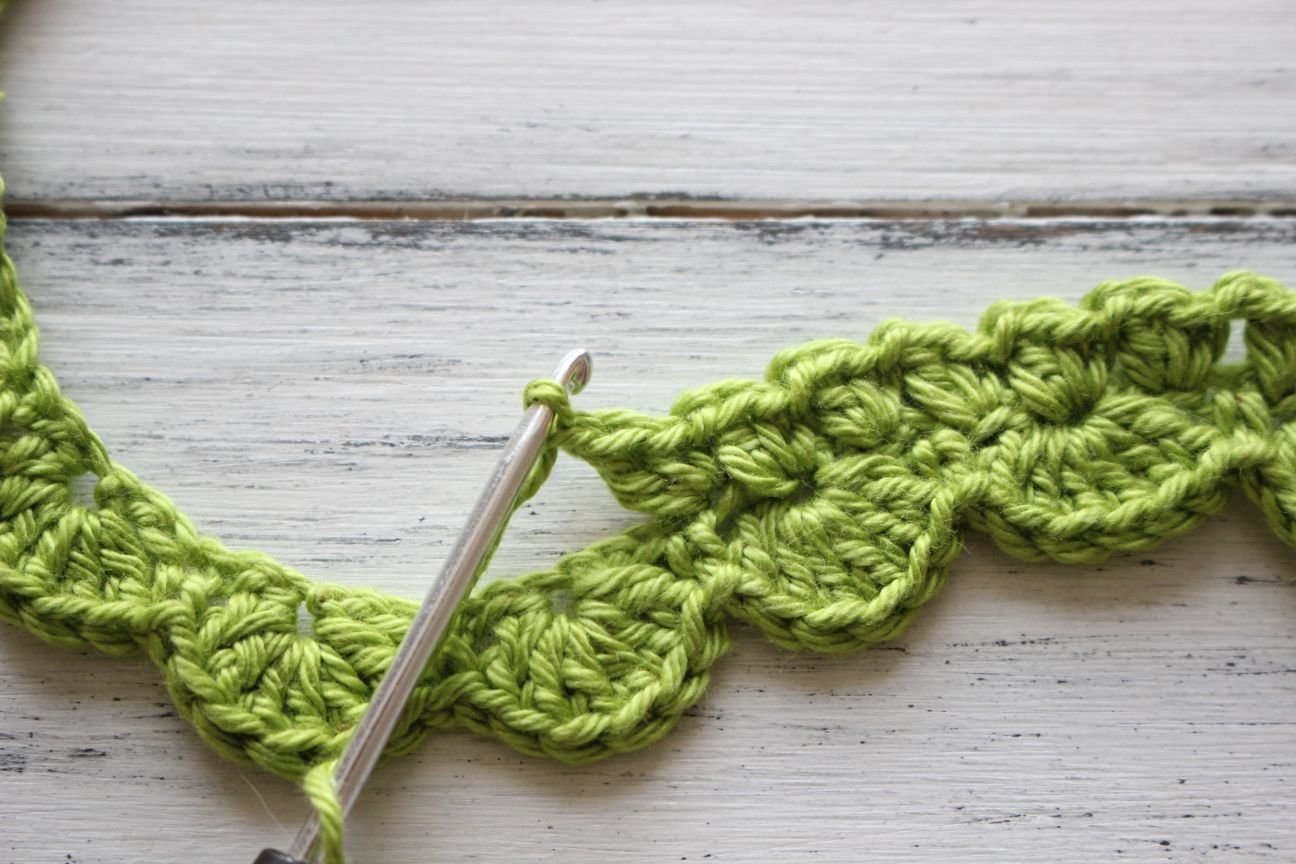
working on the other side of the foundation chain: chain 1 stitch, 1 single crochet and 1 double crochet in the next stitch, *chain 1 stitch, skip the next stitch, single crochet and double crochet in the next stitch.
Cast off leaving a long tail for sewing.
FLOWER (10x)
.JPG)
Chain 4 stitches, join with slip stitch into a ring.
*1 single crochet, 2 double crochets, 1 single crochet* 4 times into the ring, slip stitch.
ASSEMBLY
Since all the elements of your bag are crocheted, it´s time to sew them together. Use a blunt sewing needle.
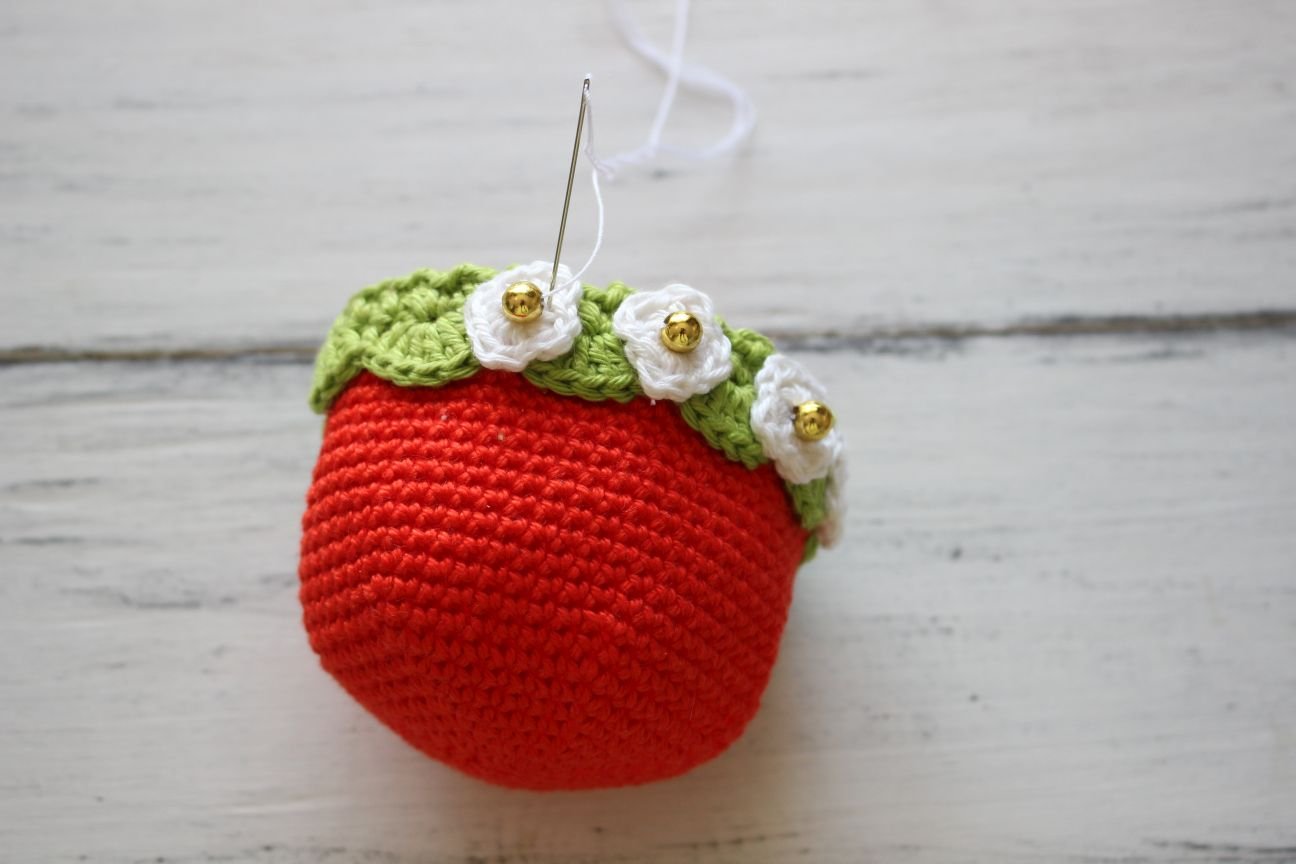
Sew the border, flowers and beads to the bag. Or add little stitches of light green or yellow for the seeds. Weave in all ends.
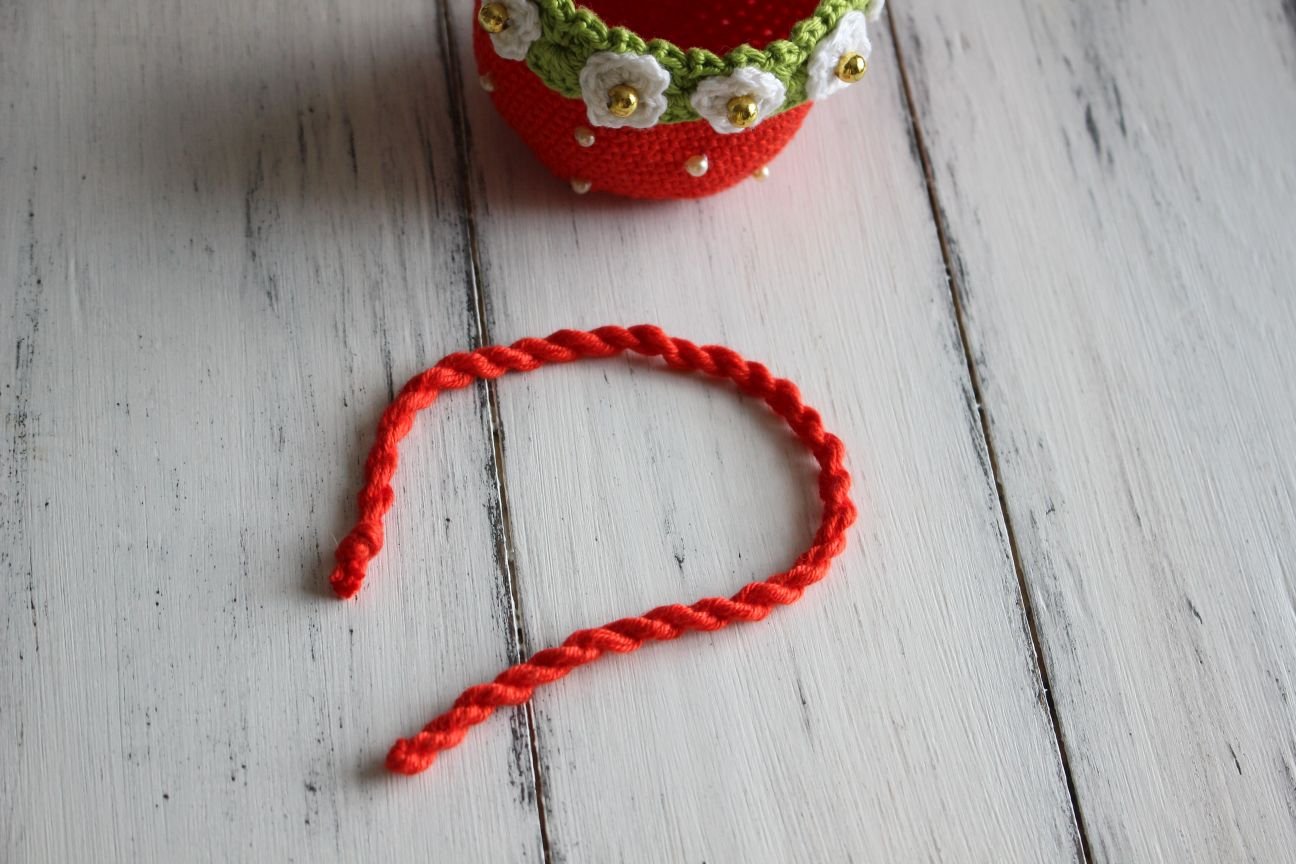
For the straps make a twisted cord ca 10-15 cm long and sew to the bag.
TWISTED CORD:
You can make a twisted cord in any size, multicolored and chunky or very fine. You can also make them one color or multicolored. The yarn must be cut a little over 4 times the length that is required. So, if you need a 10 cm cord you should cut the yarn 40 cm long.
To get started, decide how long and how thick you want your finished cord to be. Each piece of yarn is folded in half, twisted, and folded on itself again. Using two lengths gives you a cord that's eight strands thick. You can use more or fewer pieces depending on the thickness you need.
Fold the yarn strands in half and place the loop over something to hold them in place while you twist them. At the other end knot the ends of yarn together and push a pencil through the loop. With your left hand pull the yarn to keep it tight and with the other hand start winding the pencil in a clockwise direction. Once you feel you've done enough twists with the pencil remove the yarn from the key with your left hand and hold it firmly. Keeping the tension in the cord move your left hand along the cord towards the pencil, releasing it a short length at a time. It will automatically begin to twist. When the cord has stopped twisting remove the pencil. Finish your twisted cord by threading the yarn ends through the loop and tie it all into a neat little knot. Trim leaving a tiny bit of the loose ends, so that the knot won't come undone. You're now ready to attach it to your strawberry purse.
Weave ribbon through spaces between dc´s.
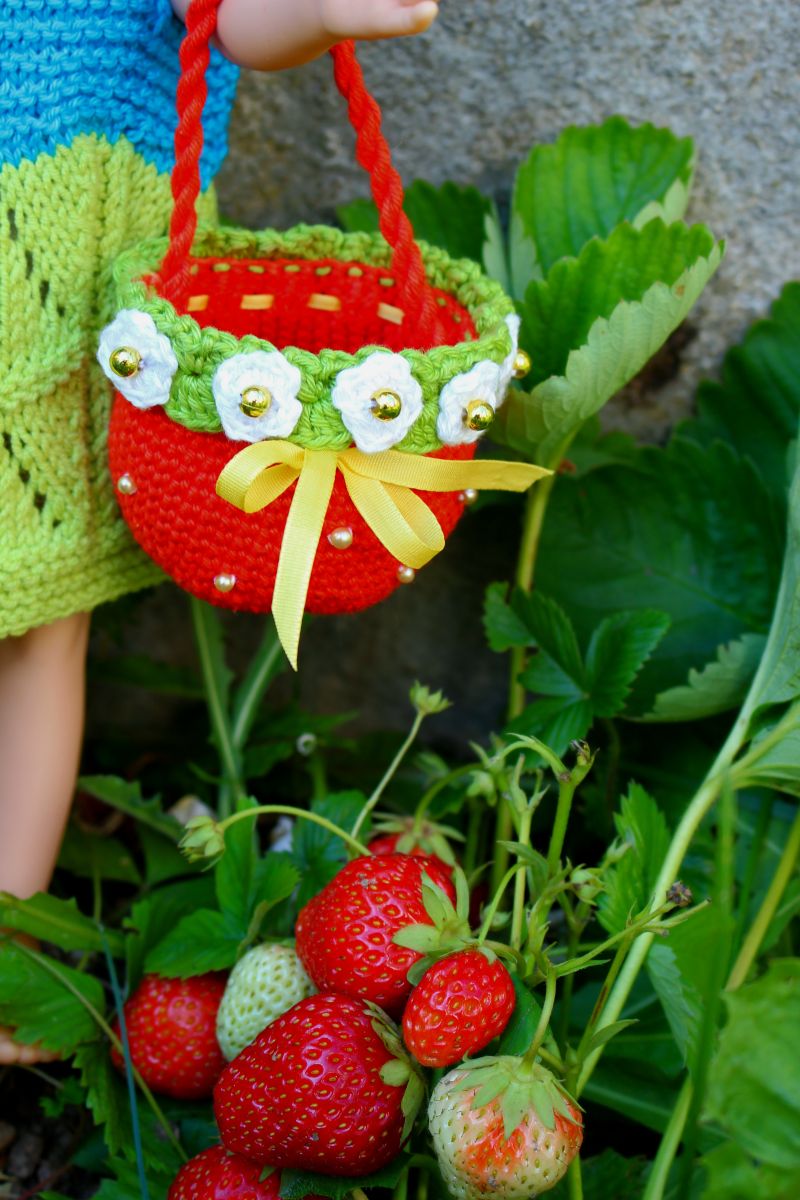
Congratulations! Your cute handbag is now complete. Enjoy your new handmade dolls purse.
I hope you enjoyed crocheting accessories and found the pattern helpful. I would love to see your finished item, so share a picture here or on Instagram by tagging me @tansuluucrafthaus.
Happy crocheting! Feel free to contact me with any questions. Thank you for stopping by and have a lovely day!


