No reviews for this item yet
Categories
Quick to Target
Community & Help


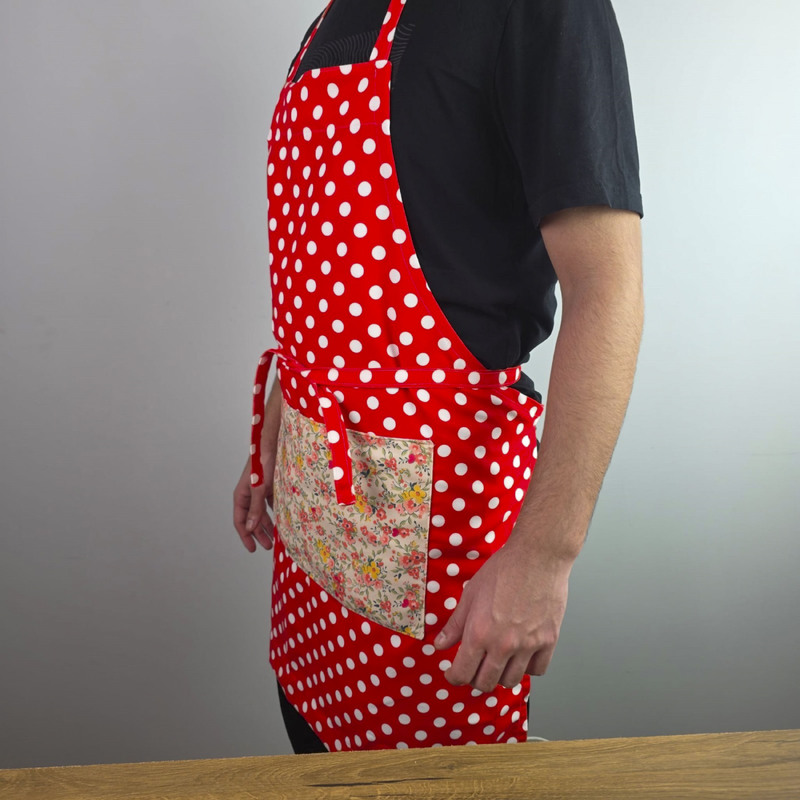
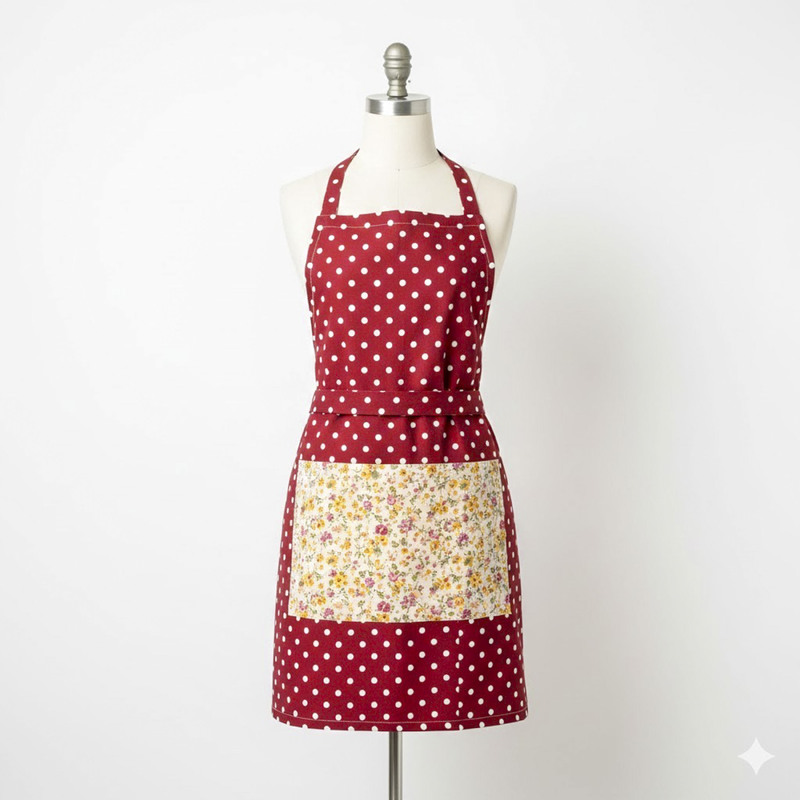


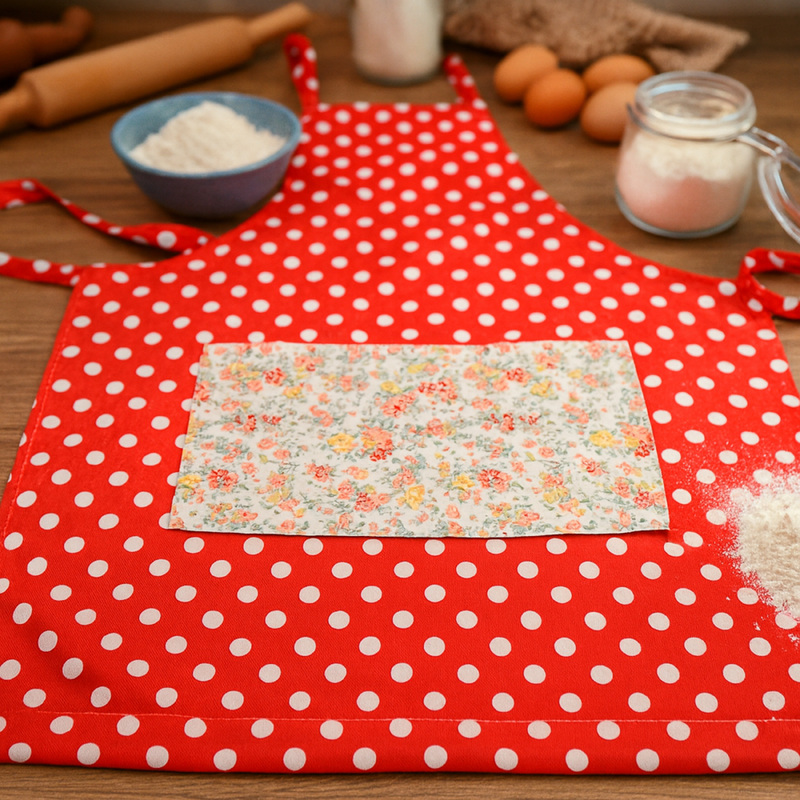


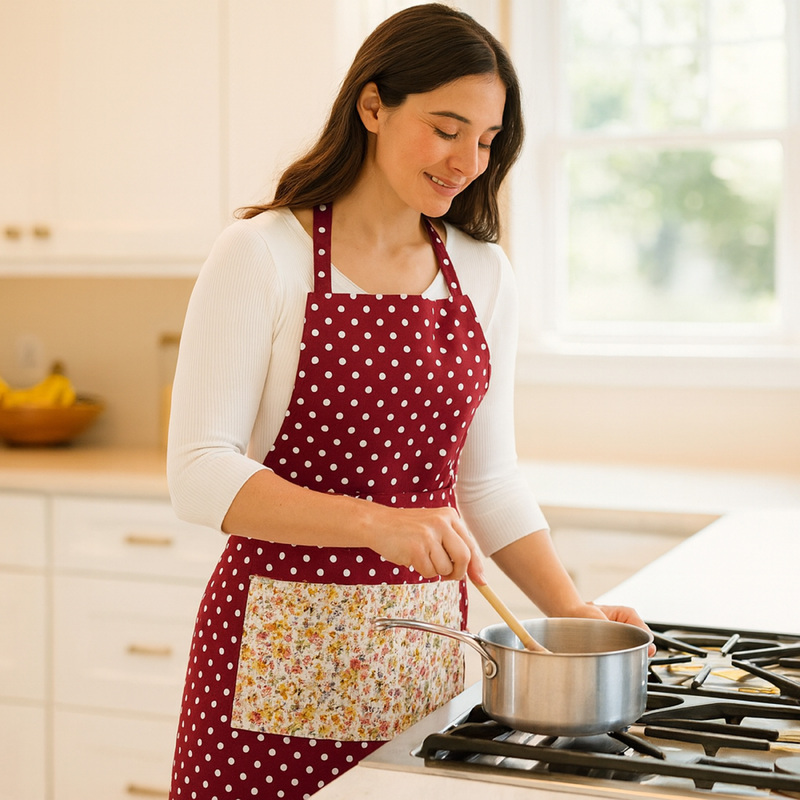


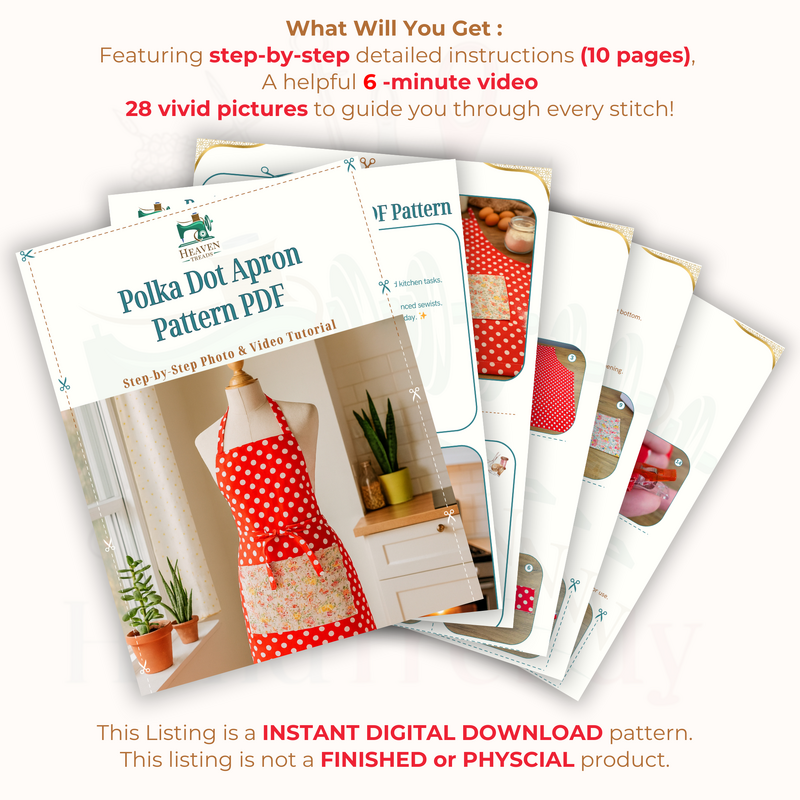


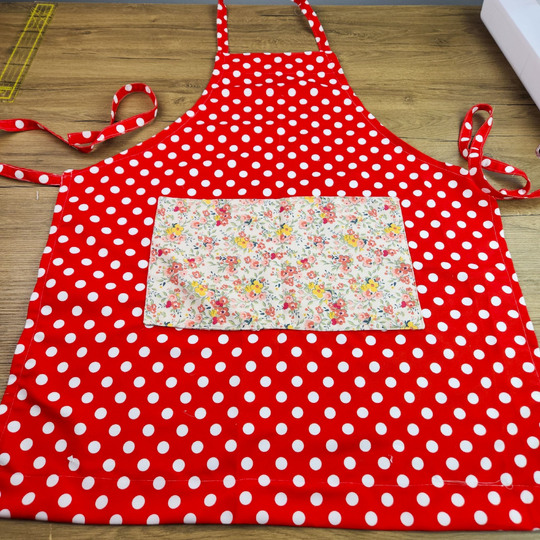

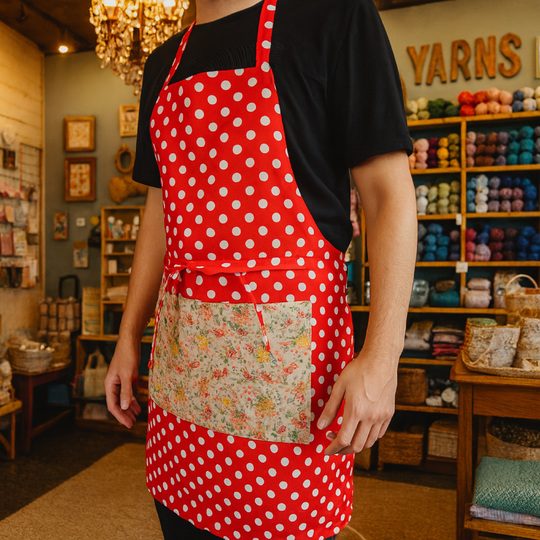
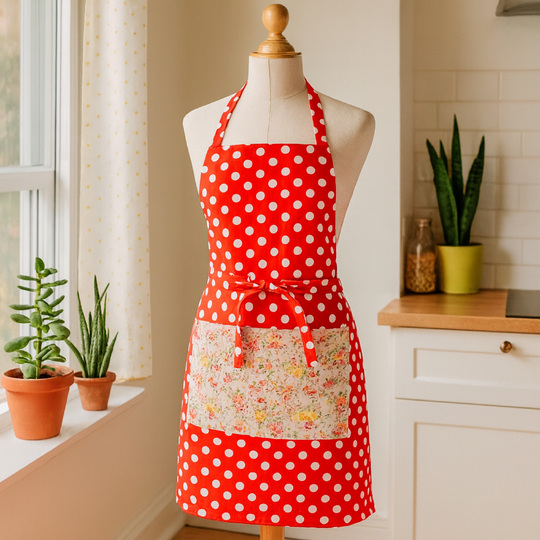

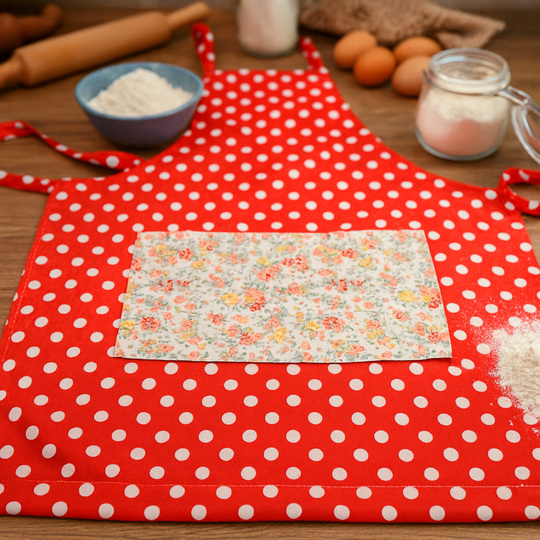
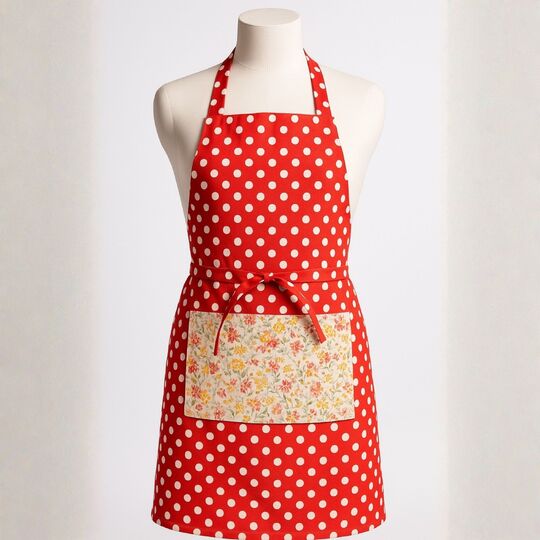


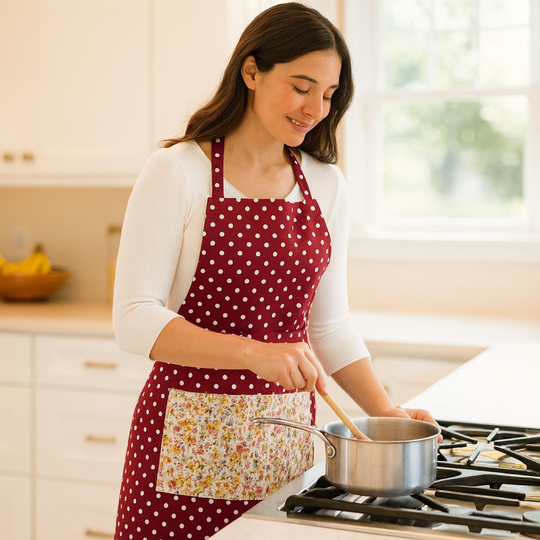


Sew a cheerful, practical kitchen apron with this Polka Dot Apron PDF pattern. The finished apron features a classic halter-style neck strap, long waist ties, and a roomy front pocket (as shown in the photos), making it ideal for everyday cooking, baking, or crafting.
You will receive a DIGITAL PDF PATTERN (not a finished apron). The instructions are presented as a step-by-step tutorial with photos, guiding you through cutting, preparing the straps and pocket, and assembling the apron.
Level of difficulty: Beginner-friendly (quick, straightforward construction with clear steps).
Required knowledge:
Basic use of a sewing machine
Straight stitching and neat edge finishing
Measuring, pressing with an iron, and working with woven fabric pieces
Instruction structure:
Written step-by-step instructions
Many progress photos for each construction stage
Printable pattern pieces and an apron cutting template included as separate PDF files (as indicated on the product page)
Techniques overview (general):
You will cut the apron body using the included pattern, construct a pocket, prepare straps/ties, attach the pocket and strap, apply the facing at the top edge, and finish the apron edges and hem.
Finished apron size (as stated in the PDF tutorial):
Length: 82 cm (32.3 inches)
Width: 69 cm (27.2 inches)
Note: Finished size may vary slightly depending on fabric choice, pressing accuracy, and sewing/hemming precision.
Materials List
Fabric / supplies (from the PDF tutorial):
Cotton polka dot fabric (main apron)
Matching fabric piece for the pocket
Sewing thread
Fabric strips for the neck strap and waist ties
Tools / equipment (from the PDF tutorial):
Scissors
Ruler or measuring tape
Sewing needle
Pins or sewing clips
Iron
Sewing machine
Optional additions (only supported by the PDF tips):
Embroidery or a label for the pocket (personalization option)
Interfacing or thicker fabric for a firmer shape
A) CROCHET / SEWING TECHNIQUES USED
Cutting fabric on the fold using the provided template
Stitching seams on a sewing machine (straight stitch)
Leaving and closing a turning opening for the pocket
Turning pieces right side out and pressing
Topstitching (pocket top and facing/finishing stitches)
Folding and pressing strap/tie edges for clean finishing
Attaching pocket by edge-stitching
Attaching neck strap and waist ties
Sewing a facing at the top edge
Double-fold edge finishing and hemming (including a deeper bottom hem finish)
B) TIPS & HELPFUL NOTES
Print at 100% and verify the test square (the PDF includes a test-square check) before cutting.
The apron body is cut without adding seam allowance (as stated in the tutorial), so follow the pattern lines exactly.
Pocket construction includes a 5 cm (2 in) opening for turning—press well for crisp edges before topstitching.
Strap/tie preparation relies on pressing folded edges before stitching for a neat result; use clips/pins to hold folds in place.
The tutorial positions the pocket using a center crease and places it 40 cm (15.7 in) down from the top edge—pressing and marking help keep it aligned.
For added stability, the PDF suggests using interfacing or a thicker fabric; for personalization, add embroidery or a label to the pocket.
Pressing at each stage is part of the construction process and helps achieve the clean shape shown in the images.
You can download the pattern immediately after receipt of payment.
Sew a cheerful, practical kitchen apron with this Polka Dot Apron PDF pattern. The finished apron features a classic halter-style neck strap, long waist ties, and a roomy front pocket (as shown in the photos), making it ideal for everyday cooking, baking, or crafting.
You will receive a DIGITAL PDF PATTERN (not a finished apron). The instructions are presented as a step-by-step tutorial with photos, guiding you through cutting, preparing the straps and pocket, and assembling the apron.
Level of difficulty: Beginner-friendly (quick, straightforward construction with clear steps).
Required knowledge:
Basic use of a sewing machine
Straight stitching and neat edge finishing
Measuring, pressing with an iron, and working with woven fabric pieces
Instruction structure:
Written step-by-step instructions
Many progress photos for each construction stage
Printable pattern pieces and an apron cutting template included as separate PDF files (as indicated on the product page)
Techniques overview (general):
You will cut the apron body using the included pattern, construct a pocket, prepare straps/ties, attach the pocket and strap, apply the facing at the top edge, and finish the apron edges and hem.
Finished apron size (as stated in the PDF tutorial):
Length: 82 cm (32.3 inches)
Width: 69 cm (27.2 inches)
Note: Finished size may vary slightly depending on fabric choice, pressing accuracy, and sewing/hemming precision.
Materials List
Fabric / supplies (from the PDF tutorial):
Cotton polka dot fabric (main apron)
Matching fabric piece for the pocket
Sewing thread
Fabric strips for the neck strap and waist ties
Tools / equipment (from the PDF tutorial):
Scissors
Ruler or measuring tape
Sewing needle
Pins or sewing clips
Iron
Sewing machine
Optional additions (only supported by the PDF tips):
Embroidery or a label for the pocket (personalization option)
Interfacing or thicker fabric for a firmer shape
A) CROCHET / SEWING TECHNIQUES USED
Cutting fabric on the fold using the provided template
Stitching seams on a sewing machine (straight stitch)
Leaving and closing a turning opening for the pocket
Turning pieces right side out and pressing
Topstitching (pocket top and facing/finishing stitches)
Folding and pressing strap/tie edges for clean finishing
Attaching pocket by edge-stitching
Attaching neck strap and waist ties
Sewing a facing at the top edge
Double-fold edge finishing and hemming (including a deeper bottom hem finish)
B) TIPS & HELPFUL NOTES
Print at 100% and verify the test square (the PDF includes a test-square check) before cutting.
The apron body is cut without adding seam allowance (as stated in the tutorial), so follow the pattern lines exactly.
Pocket construction includes a 5 cm (2 in) opening for turning—press well for crisp edges before topstitching.
Strap/tie preparation relies on pressing folded edges before stitching for a neat result; use clips/pins to hold folds in place.
The tutorial positions the pocket using a center crease and places it 40 cm (15.7 in) down from the top edge—pressing and marking help keep it aligned.
For added stability, the PDF suggests using interfacing or a thicker fabric; for personalization, add embroidery or a label to the pocket.
Pressing at each stage is part of the construction process and helps achieve the clean shape shown in the images.
Once Buyers review this product, the product rating, breakdown, and customer experiences will appear here.


Share your ideas, creations, and experiences.
You'll need an account to use these features. You can create an account or log in.
42 prizes / total value €300: 30×€5, 10×€10, 2×€25 – simply activate the newsletter. No purchase necessary. Unsubscribe at any time. Prizes are awarded as Crazypatterns shopping credit. Learn more
Ask Question