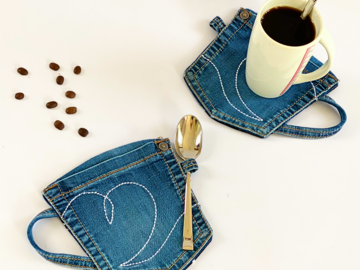
Potholders are not only practical kitchen utensils, but also a great DIY sewing project for beginners and experienced sewers alike. With a little creativity, you can create custom potholders that not only protect you from heat, but also add a personal touch to your kitchen. In this detailed sewing tutorial, I'll show you step-by-step how to make stylish and functional potholders.
Whether you choose classic designs, colorful patterns, or seasonal motifs, this tutorial will help you create your own potholders that will not only enhance your kitchen, but can also serve as a loving gift for friends and family.
Before we get started, make sure you have all the materials you need handy, including fabrics, cutting tools, and sewing supplies. Once you have everything ready, you can look forward to the creative process of sewing and designing your own potholders.
Ready? Then let's get started and put your sewing skills into practice to create beautiful and practical potholders that will become indispensable in your kitchen!
You will need (for 2 potholders):
- Fabric for the top of the potholders (cotton or heat-resistant fabric)
- Thermolam (heat reflective insulating material)
- Fabric for the bottom of the potholders (cotton or heat-resistant fabric)
- bias tape (matching the color of the fabric) about 85 cm in total
- sewing machine
- sewing thread
- scissors or rotary cutter
- fabric chalk or fabric marker
- A drinking glass
- Pins or Wonderclips
- Iron
Cut the fabric:
Cut two squares from the top fabric and two squares from the bottom fabric, each measuring 18 x 18 cm.
Also cut four squares from the Thermolam with the same dimensions. We need two layers of Thermolam per potholder, so that it also properly keeps the heat out.
Round off the corners:
Now lay the layers on top of each other as follows: first the bottom with the nice side down, then 2 layers of Thermolam on top, finally once the top fabric with the nice side up.
Now place a drinking glass at each corner so that a quarter circle is stretched across the corner and mark it with tailor's chalk or a trick marker.
Then cut all the corners round along the marked lines. If your scissors / rotary cutter can't handle all the layers at once, you can also cut each layer separately.
Sew together:
Now mark a cross with a ruler on each potholder, and sew the layers together along this line.
Insert: Make your own bias tape:
Homemade bias tape is a great way to use the exact colors and patterns you want for your sewing project. To make your own bias tape, take matching fabric and cut it into strips at a 45° angle to the grain. This has the advantage that even non-stretch woven fabric will stretch in this direction.
For homemade bias tape for potholders, I recommend cutting strips 4.5 cm wide. Scraps of fabric are also good for this, as the individual strips can be easily sewn together by laying them on top of each other in an L-shape and then joining them with a diagonal seam from corner to corner. Then trim the seam allowance a little and iron it apart.
Now we first folded from one side 1 cm inward and ironed, then the same procedure is done from the other side. Ready is your own bias tape!
Attach bias tape:
Now fold over one folded edge of the bias tape and pin it right sides together on the potholder. Make sure that you stretch the bias tape a little at the curves, then it will fit well later. Also, fold the beginning of the bias tape inward so that no raw edge is visible.
Then sew the bias tape along the still visible raw edge. Start just after a curve and end just before the beginning of the bias tape.
Then slip the rest of the bias tape over the potholder and secure it again with pins or clips. Then sew the bias tape all around with close edges.
Now the hanger is made from the overhanging bias tape.
To do this, fold the bias tape (and fold the end inward) and sew it together close to the edge. Then put it to the loop over the corner and sew it tight (caution: It is best to work with the handwheel or sew by hand so that the needle does not bend with the many layers!)
When everything is well sewn, cut off any excess thread ends and iron the flaps so that the seams relax.
Your potholder is finished! The second is made in exactly the same way. Have fun sewing and cooking! 😊
.PNG)
.PNG)
.PNG)
.PNG)
.PNG)
.PNG)
.PNG)


