Categories
Quick to Target
Community & Help

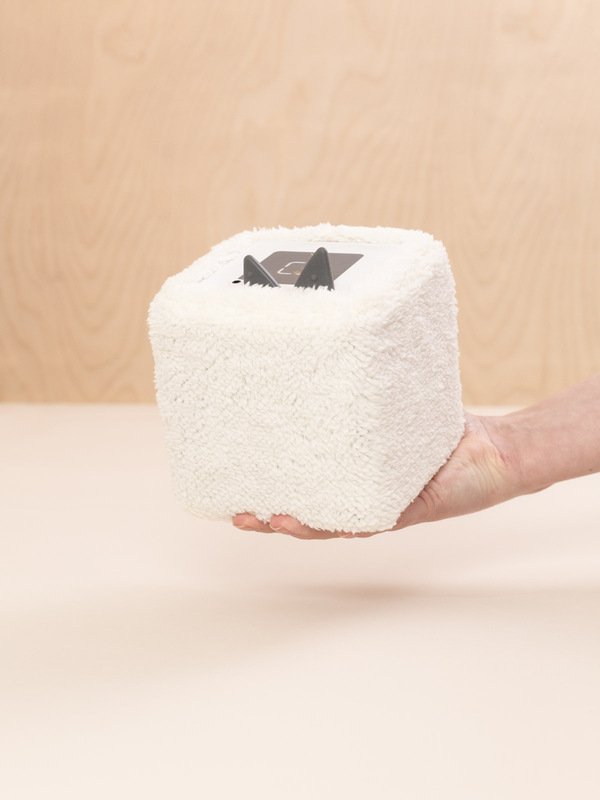

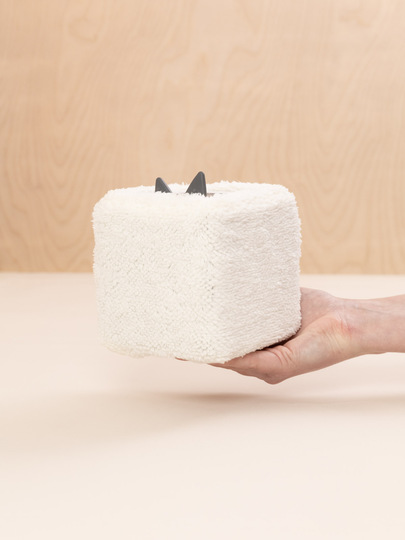


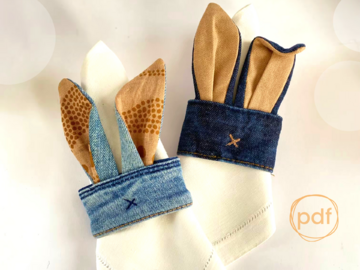
The Plush Audiobox Cover was born out of my passion for cuddly plush fabrics. After getting lost in countless Pinterest boards full of plush ideas, I came up with the idea of using this wonderful fabric to make a cover for our Audiobox. I was immediately impressed by the elastic plush - not only does it look great, but it doesn't affect the sound of the box, creating the perfect compromise between look and function.
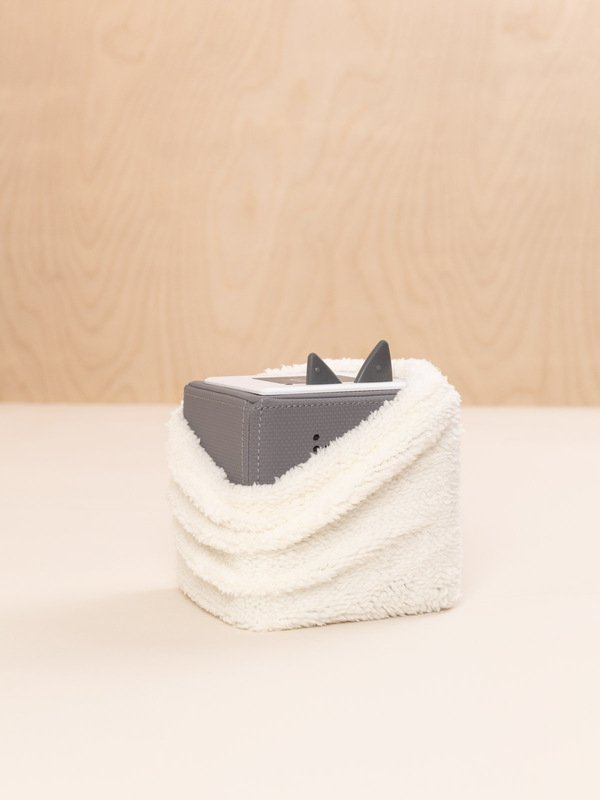
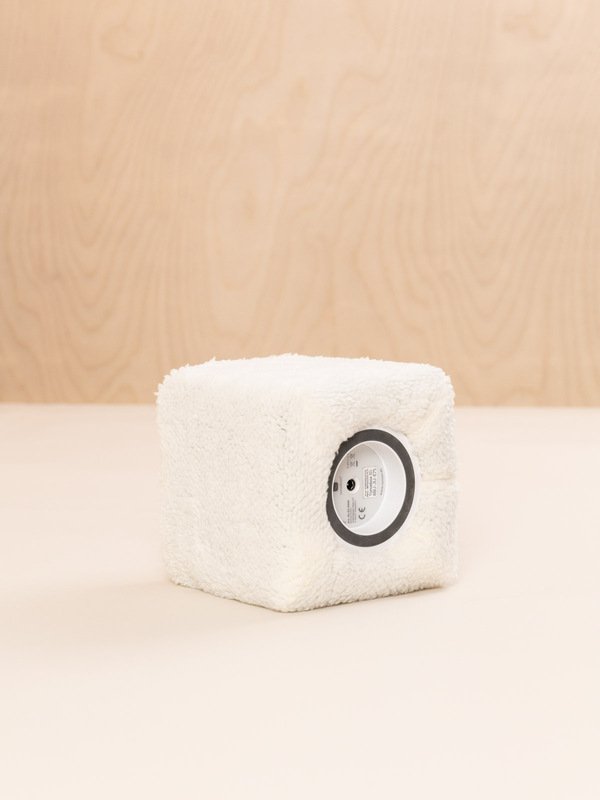
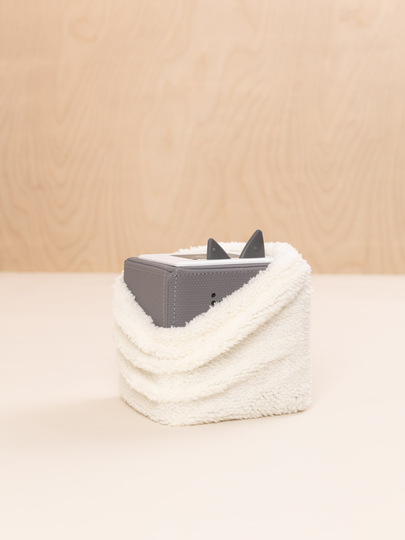
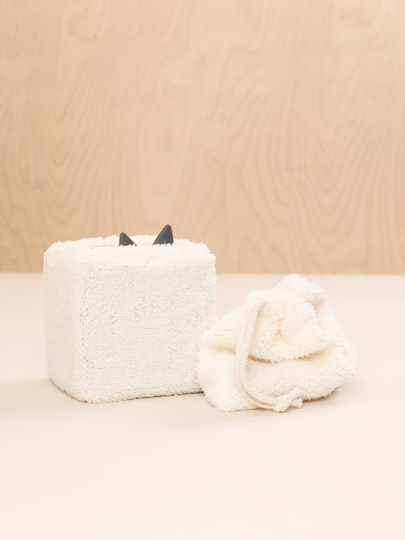
I paid special attention to designing a cover that would be easy to sew and still fit well without too many visible seams. My solution was an elastic band at the top and corners that are tucked under the bottom of the box. This way the cover is held securely in place and does not interfere with the loading of the box.
The first cover was made because we had decided on a gray box, so we really needed a new look - to match my daughter's favorite color: pink. The plush cover not only refreshed the look of the box, but also turned it into a cuddly companion.
If you're thinking of sewing a plush cover for your sound box, here's a little tip: Test the fabric by placing it over the speaker to make sure it won't affect the sound. Some fabrics can be surprisingly sound absorbing, and it's also important to check the opacity of the fabric to make sure no distracting splashes of color show through.
What I really like about the finished cover is how quickly the Audiobox can be transformed - it's like a little sweater that gives it a new, cozy life and is easy to change. The kids' reactions speak for themselves: they love the new look of their Audiobox, and I have sewn and sold over 800 of these covers.
If you are looking for a creative project for beginners, this cover is perfect. Not only does it protect the box, but it also offers plenty of possibilities for customization.
Size: Perfect fit for the standard Audiobox.
Basic Knowledge Guides with Tips and Tricks for Beginners:
Language: German, English
Size: Perfect fit for the standard Audiobox.
Copyright Notice: The digital instructions and pattern are protected by copyright and are intended for personal use only. Any reproduction or distribution without prior permission is prohibited. If you have questions about usage rights, please don't hesitate to contact us. More information can be found in our copyright notice at:
Product Safety Notice
This pattern has been carefully created for private implementation under your own responsibility. When making the item, please observe applicable safety requirements - especially for products intended for children (e.g., cords, small parts that could be swallowed, or flammable materials). Ensure safe processing and appropriate materials.
The responsibility for safe use and implementation lies with you as the user.
Manufacturer information according to Regulation (EU) 2023/988 (GPSR)
Gesa Jansen – byGesa
Kampstraße 34
22113 Oststeinbek
Germany
hello@bygesa.de
You can download the pattern immediately after receipt of payment.
The Plush Audiobox Cover was born out of my passion for cuddly plush fabrics. After getting lost in countless Pinterest boards full of plush ideas, I came up with the idea of using this wonderful fabric to make a cover for our Audiobox. I was immediately impressed by the elastic plush - not only does it look great, but it doesn't affect the sound of the box, creating the perfect compromise between look and function.
I paid special attention to designing a cover that would be easy to sew and still fit well without too many visible seams. My solution was an elastic band at the top and corners that are tucked under the bottom of the box. This way the cover is held securely in place and does not interfere with the loading of the box.
The first cover was made because we had decided on a gray box, so we really needed a new look - to match my daughter's favorite color: pink. The plush cover not only refreshed the look of the box, but also turned it into a cuddly companion.
If you're thinking of sewing a plush cover for your sound box, here's a little tip: Test the fabric by placing it over the speaker to make sure it won't affect the sound. Some fabrics can be surprisingly sound absorbing, and it's also important to check the opacity of the fabric to make sure no distracting splashes of color show through.
What I really like about the finished cover is how quickly the Audiobox can be transformed - it's like a little sweater that gives it a new, cozy life and is easy to change. The kids' reactions speak for themselves: they love the new look of their Audiobox, and I have sewn and sold over 800 of these covers.
If you are looking for a creative project for beginners, this cover is perfect. Not only does it protect the box, but it also offers plenty of possibilities for customization.
Size: Perfect fit for the standard Audiobox.
Basic Knowledge Guides with Tips and Tricks for Beginners:
Language: German, English
Size: Perfect fit for the standard Audiobox.
Copyright Notice: The digital instructions and pattern are protected by copyright and are intended for personal use only. Any reproduction or distribution without prior permission is prohibited. If you have questions about usage rights, please don't hesitate to contact us. More information can be found in our copyright notice at:
Product Safety Notice
This pattern has been carefully created for private implementation under your own responsibility. When making the item, please observe applicable safety requirements - especially for products intended for children (e.g., cords, small parts that could be swallowed, or flammable materials). Ensure safe processing and appropriate materials.
The responsibility for safe use and implementation lies with you as the user.
Manufacturer information according to Regulation (EU) 2023/988 (GPSR)
Gesa Jansen – byGesa
Kampstraße 34
22113 Oststeinbek
Germany
hello@bygesa.de
Once Buyers review this product, the product rating, breakdown, and customer experiences will appear here.


Share your ideas, creations, and experiences.
You'll need an account to use these features. You can create an account or log in.
42 prizes / total value €300: 30×€5, 10×€10, 2×€25 – simply activate the newsletter. No purchase necessary. Unsubscribe at any time. Prizes are awarded as Crazypatterns shopping credit. Learn more
Ask Question